When you have set up your account, you may then go ahead and invite your colleagues to your account. Your colleagues will have access to the patient information within your account, and, depending on your invitation, may have access to more advanced functions such as adding/removing users.
Note: only an admin of the account can add another user to the account. If you are not an admin, some elements in this guide will be missing from your interface. If you were the one to create the account in the first place, you are automatically an admin of your account.
Why It's Important
This page helps Administrators add, modify, and remove users from the platform.
How to Access
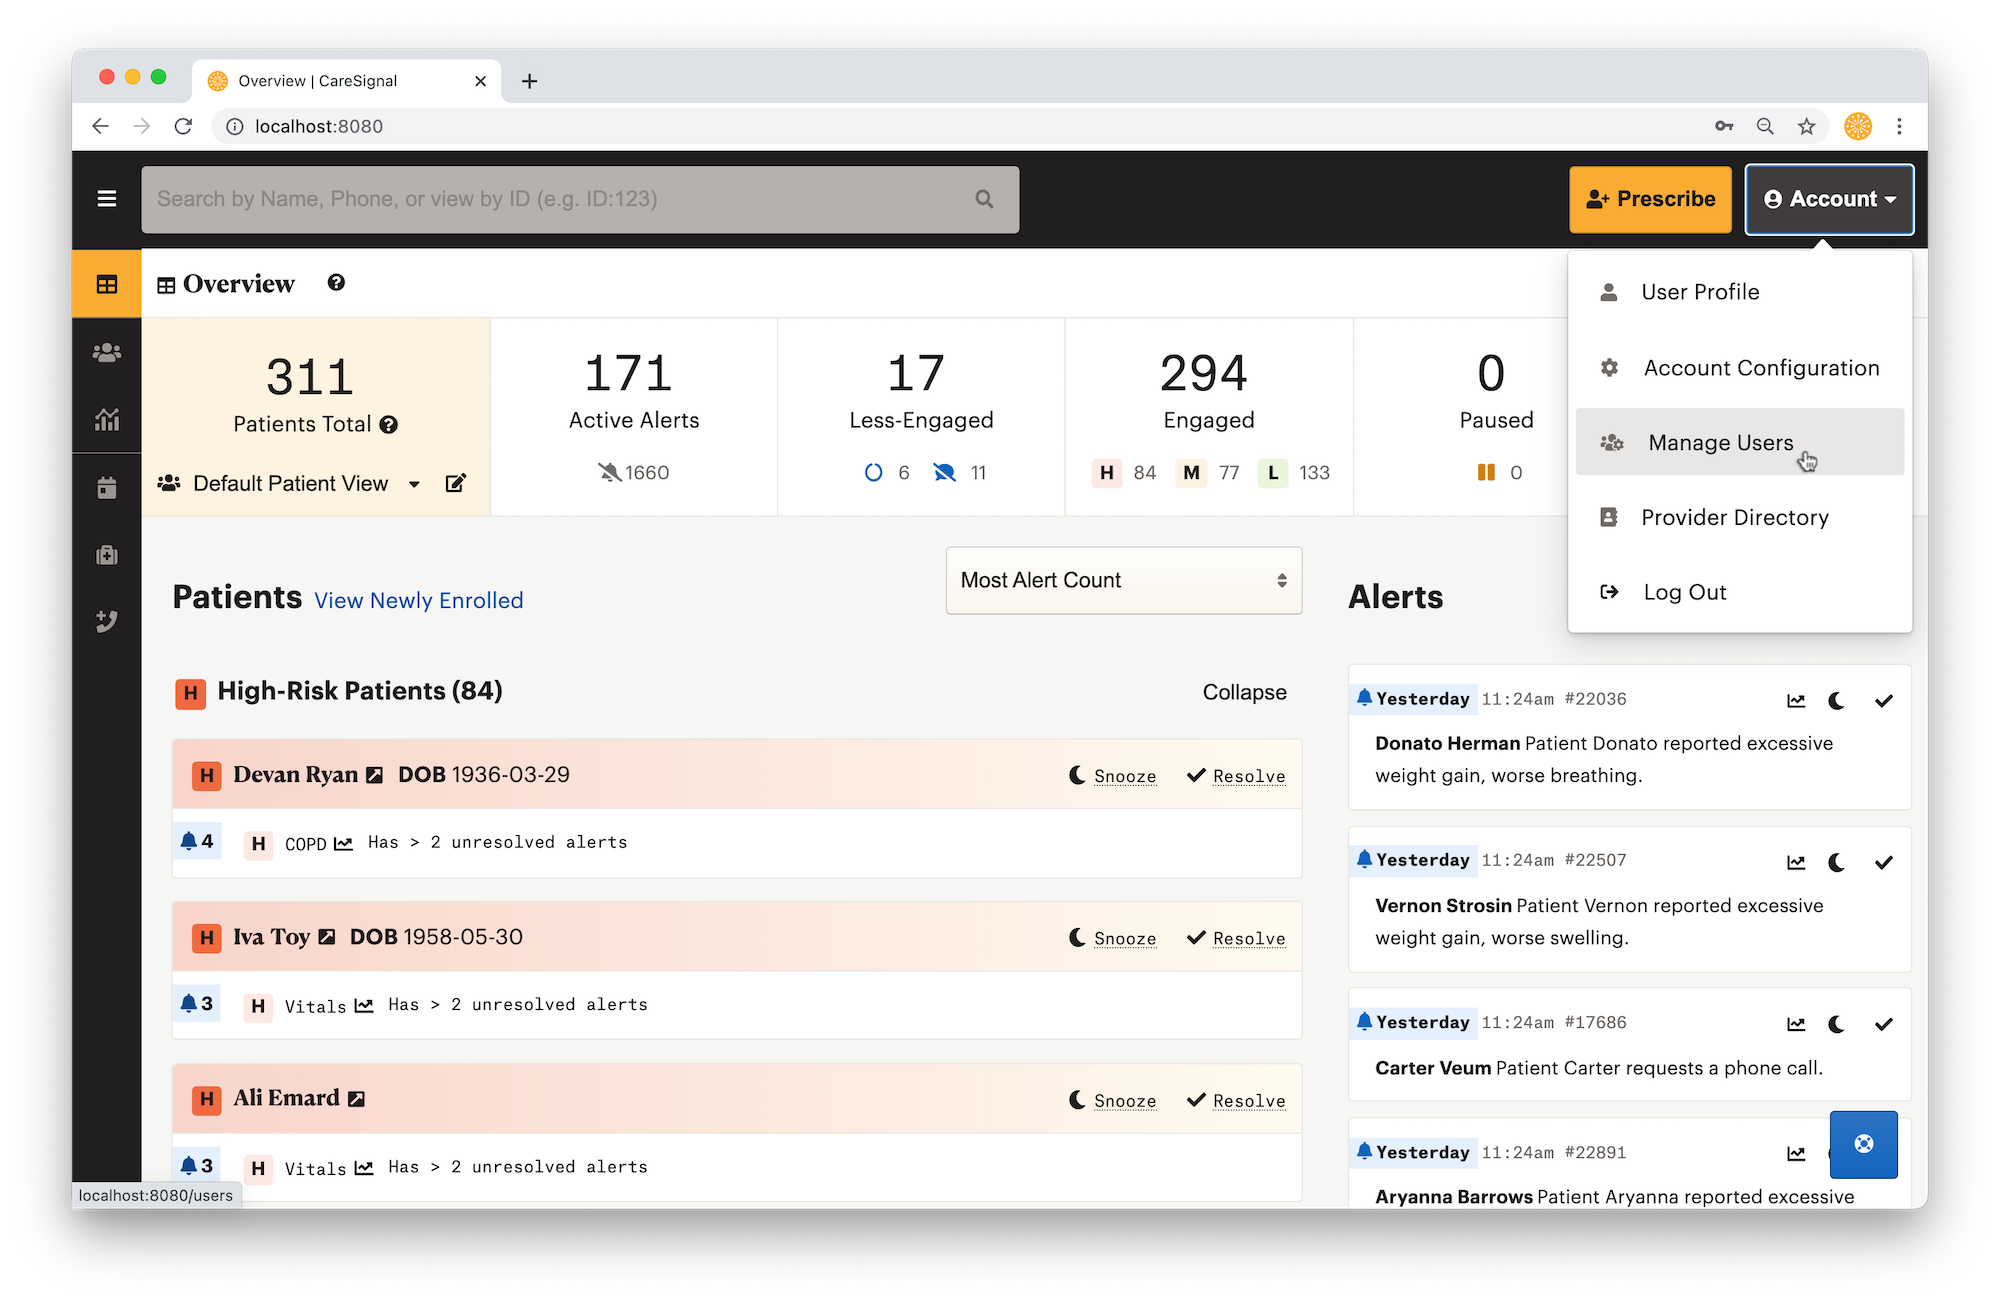
Click on the Account button at the top right corner of the page and select the Manage Users button on the menu
How to Use
Add a New User
Select User Permissions
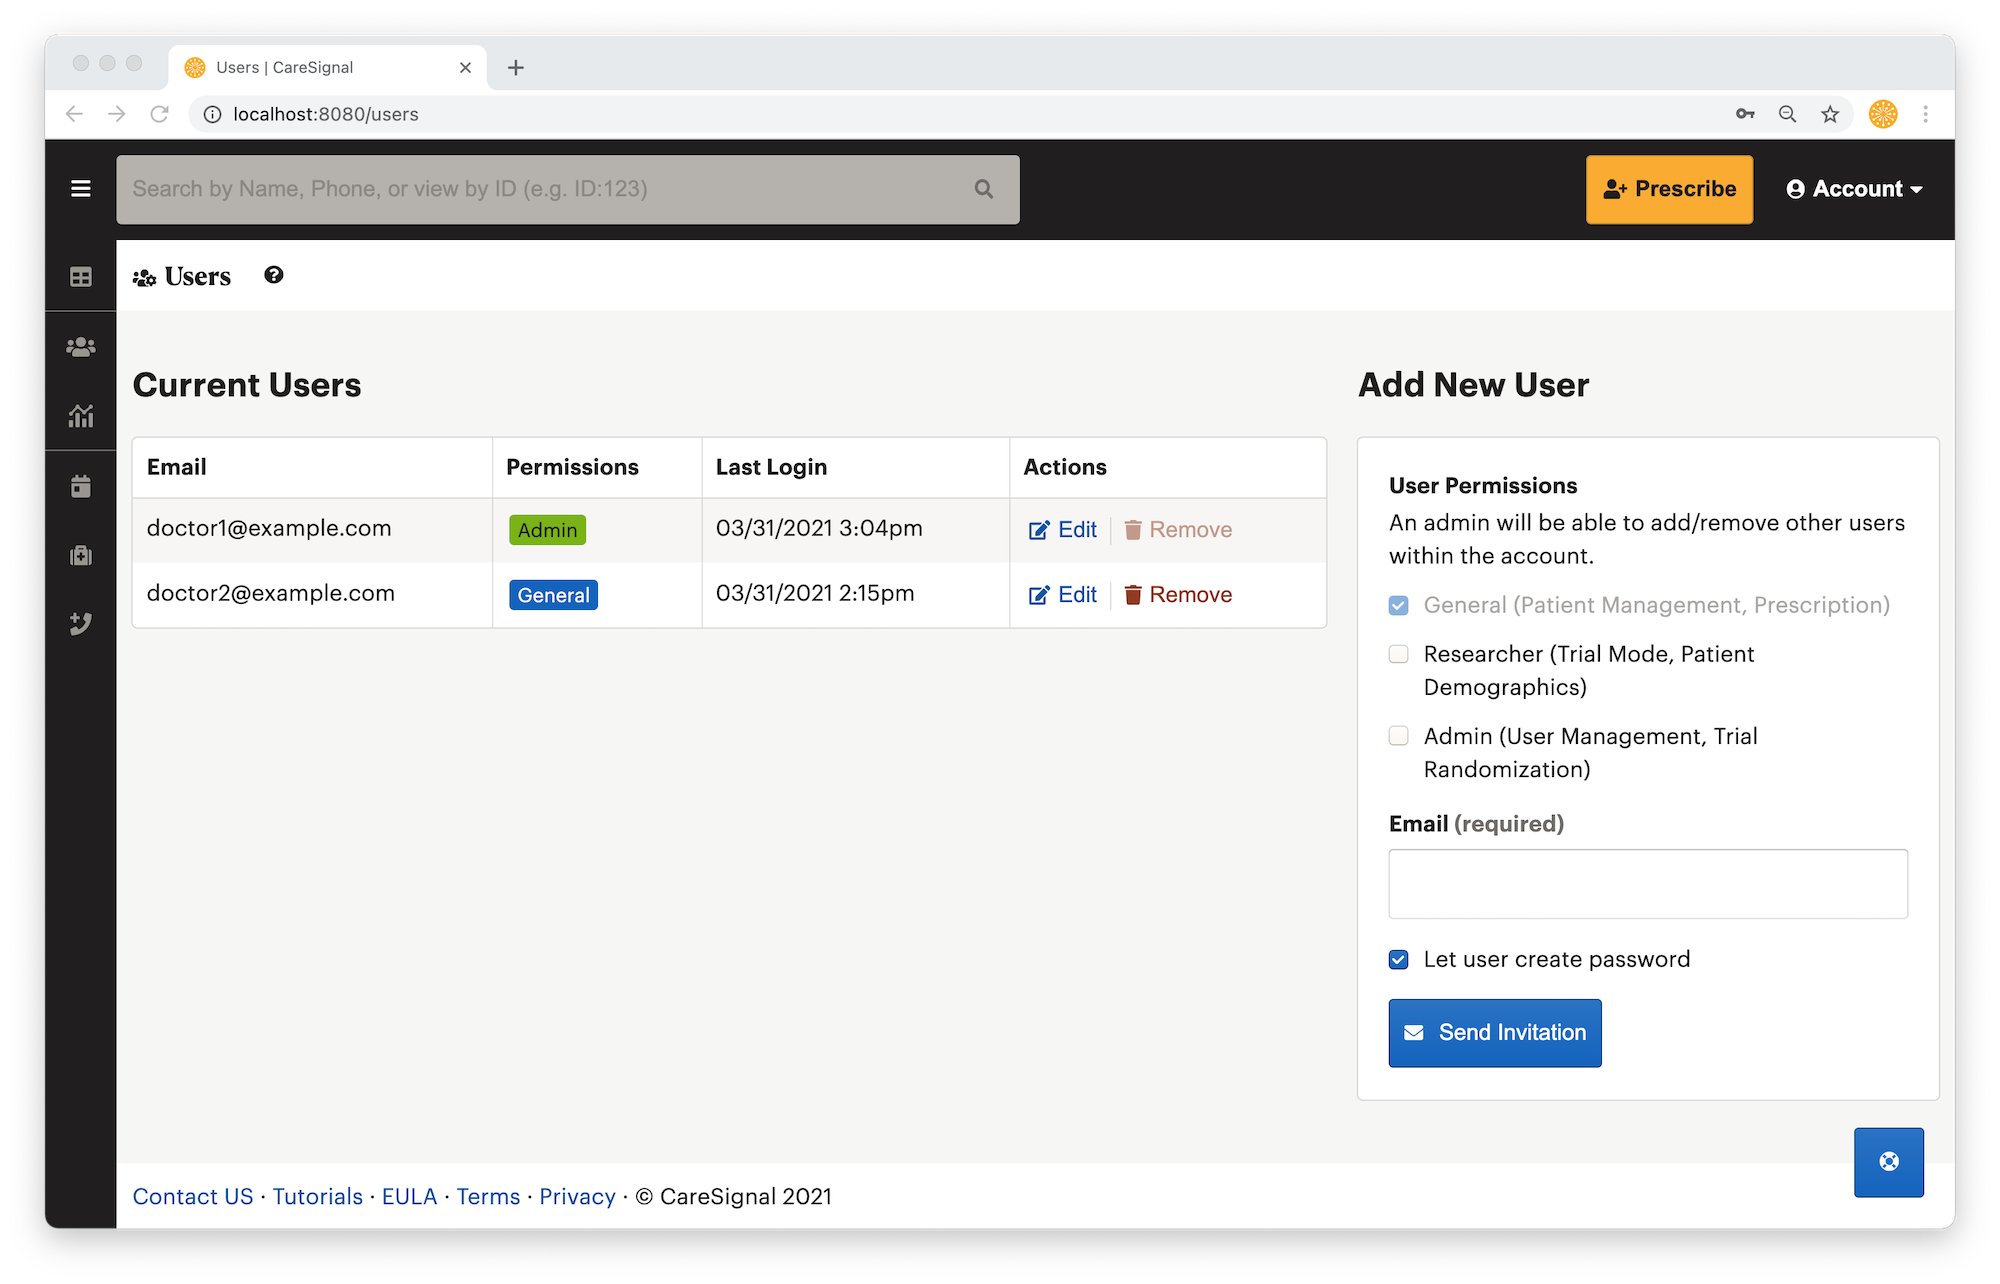
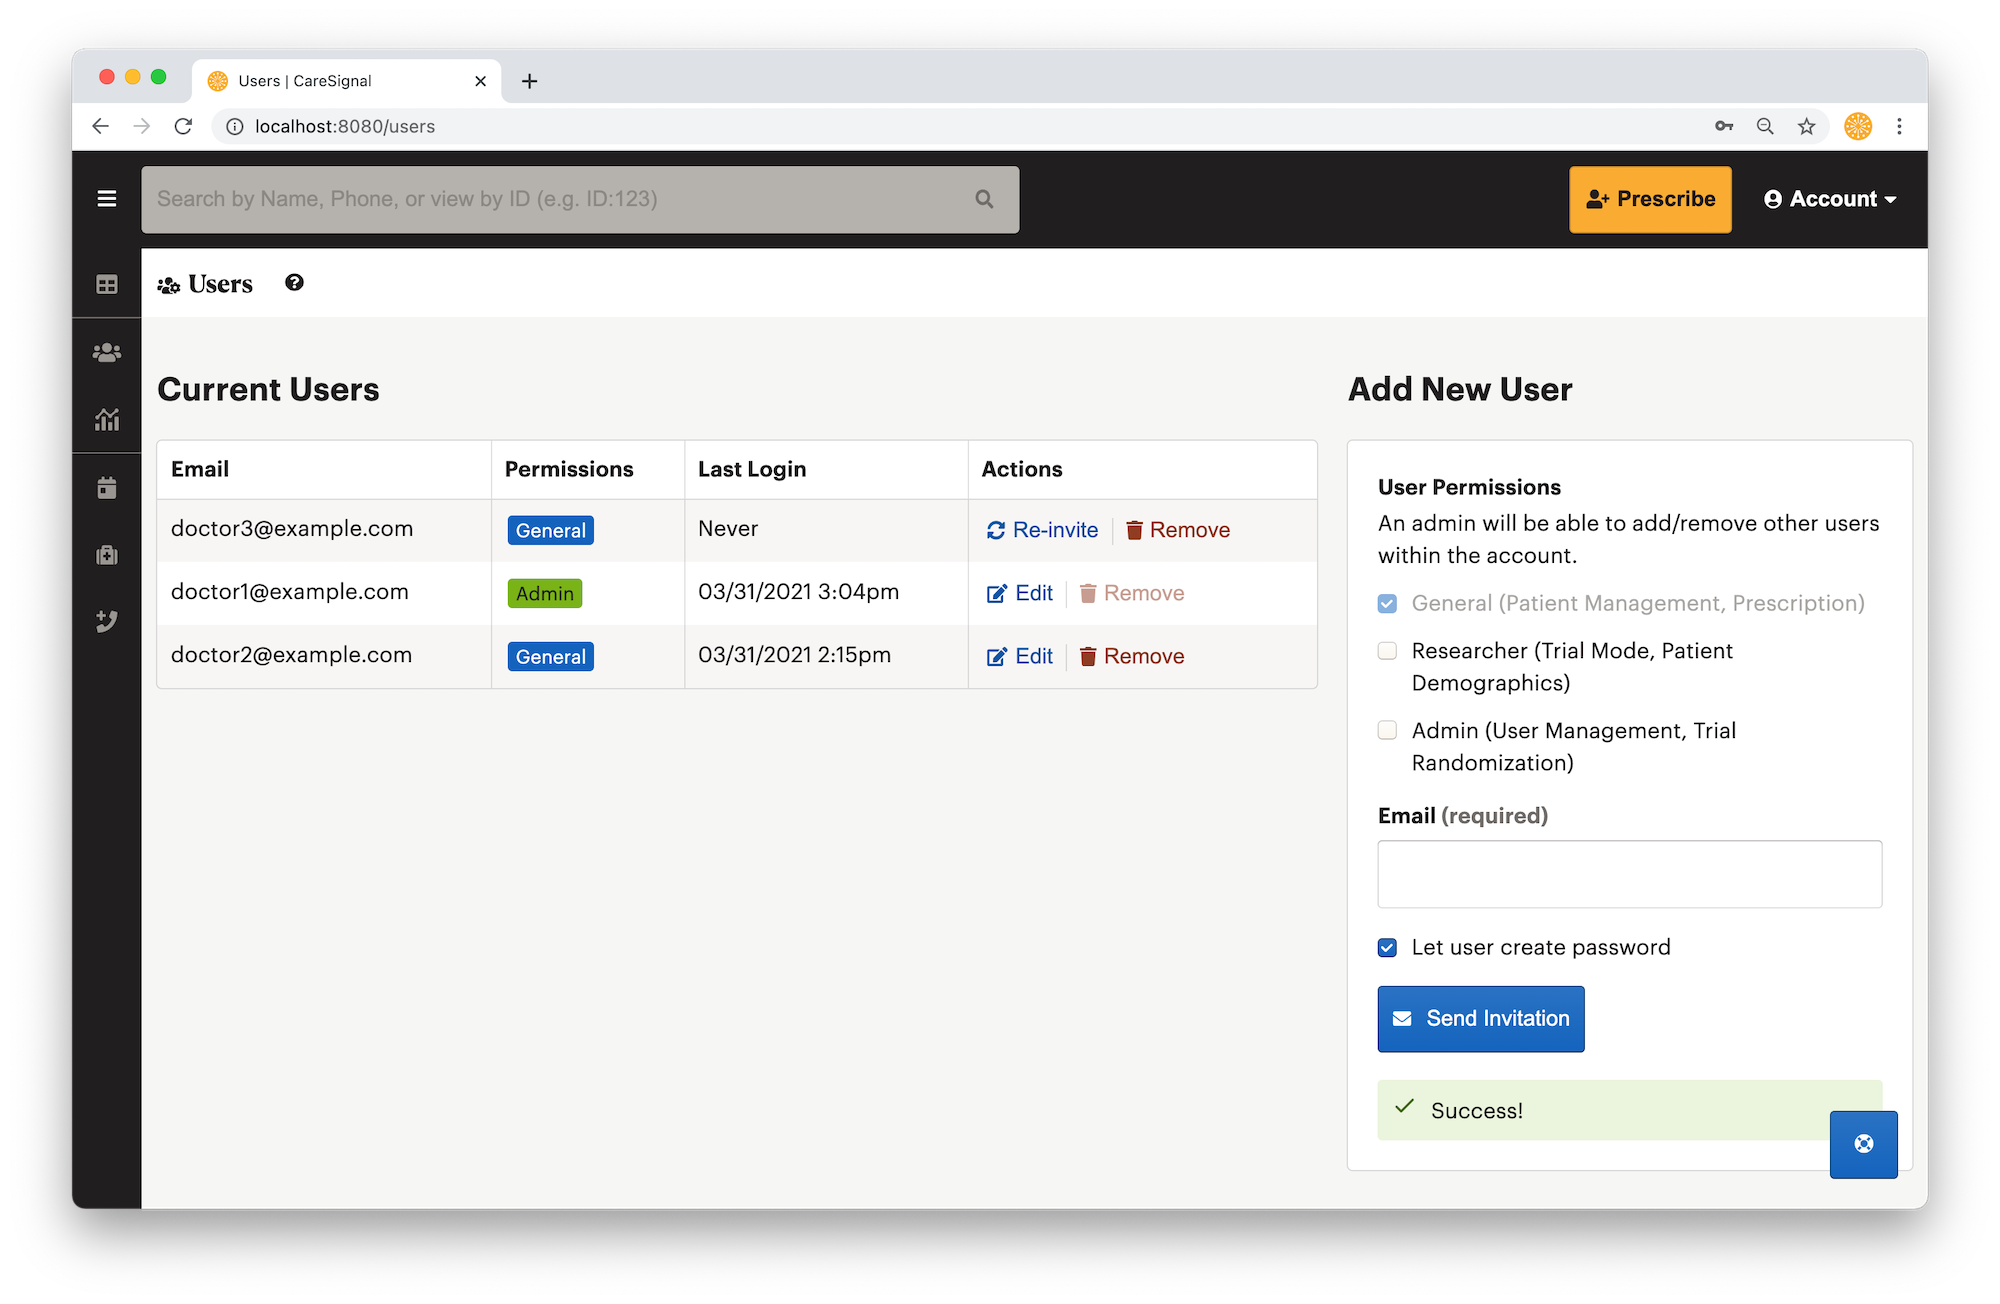
Now that you are on the user management page, you will see a list of all current users and the Add New User form on the right part of the page. There you can go ahead and set up the new user's permissions:
- General: the default permission for all users, this is the permission that most users fall into, and should be sufficient for day to day usage. General users can add patients, make and edit prescriptions, but cannot remove a patient.
- Researcher: this permission grants the user access to the clinical trial related functions, such as recording patient demographics and randomized controlled trial utilities.
- Admin: this permission grants the user management capability.
Once you have picked the appropriate permissions, enter the email of the user you want to invite in the email field.
Before you add the user, you can decide whether to let the new user create the password, or to create the password yourself.
Let user create password:
This is the default option: when you add a user via this method, the user will receive an email invitation that contains a unique link to set up their account as well as their password.
Set the password for the user:
Should you want to set the password directly for the user, simply uncheck the Let user create password checkbox, and enter a password you desire. The user will NOT receive an email invitation - you should inform the user about the password and the user can login directly to the account.
The password should satisfy the following password strength requirements:
- Must be 8 - 32 characters long
- Contains a lower and upper case character
- Contains a number
- Contains a symbol: ! ? & % $ *
Confirm to Add User
Now that's all set, go ahead and click the Send Invitation button (if you are letting the user create the password) or the Add New User button (if you are creating the password for the user). You will receive a confirmation dialog, and you can see the user newly added show up in the list of users in your account.
Note: the invitation email can sometimes land in the SPAM inbox of the user's email, so make sure to check it there. If after a period of time the user still has not received any invitation email, simply remove the user by clicking the trash icon in your Current Users list, and try again.
Delete a User
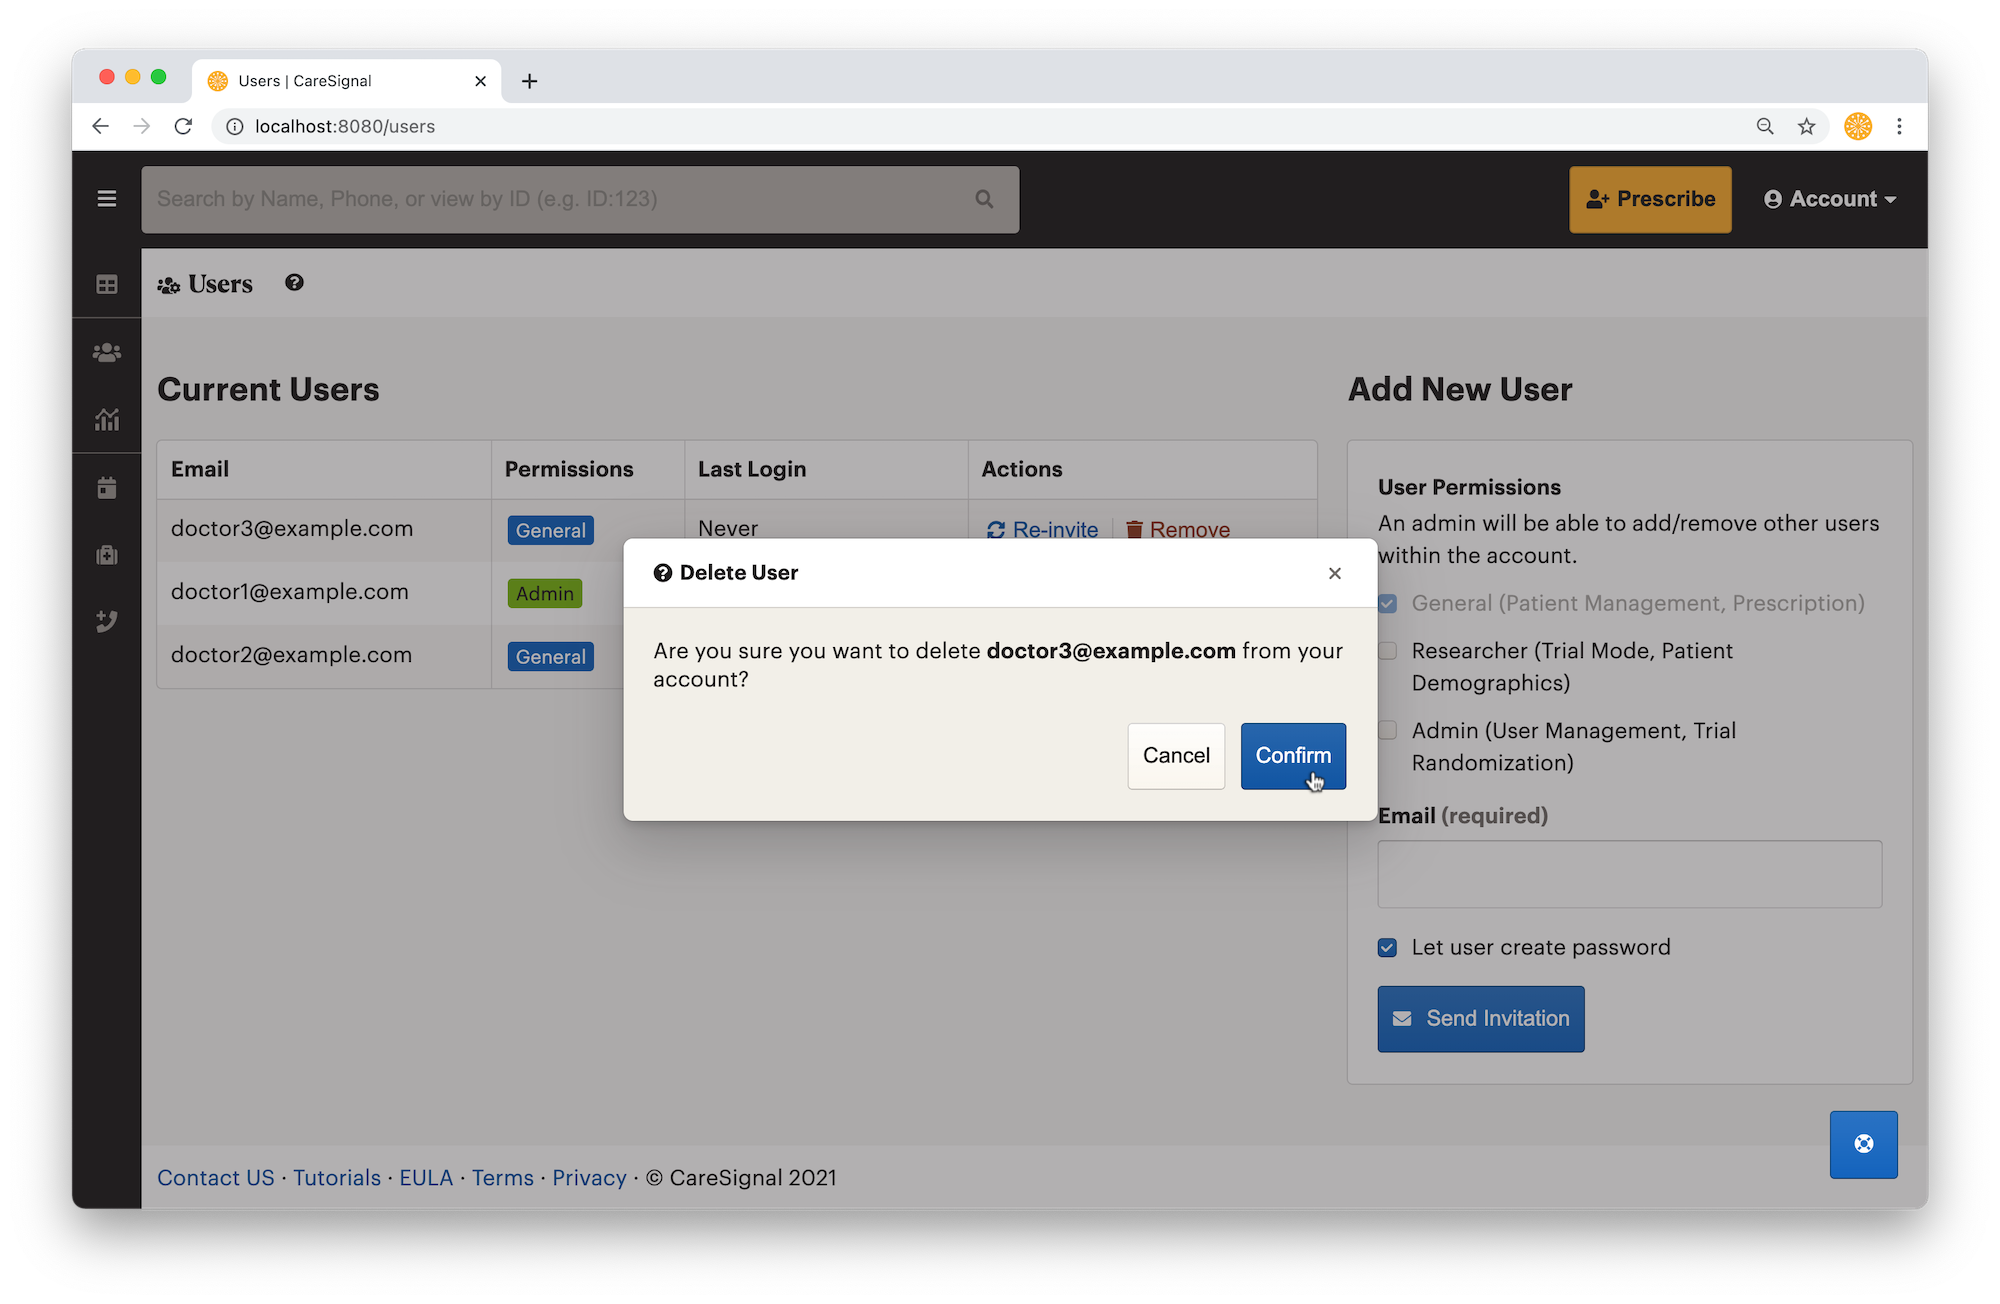
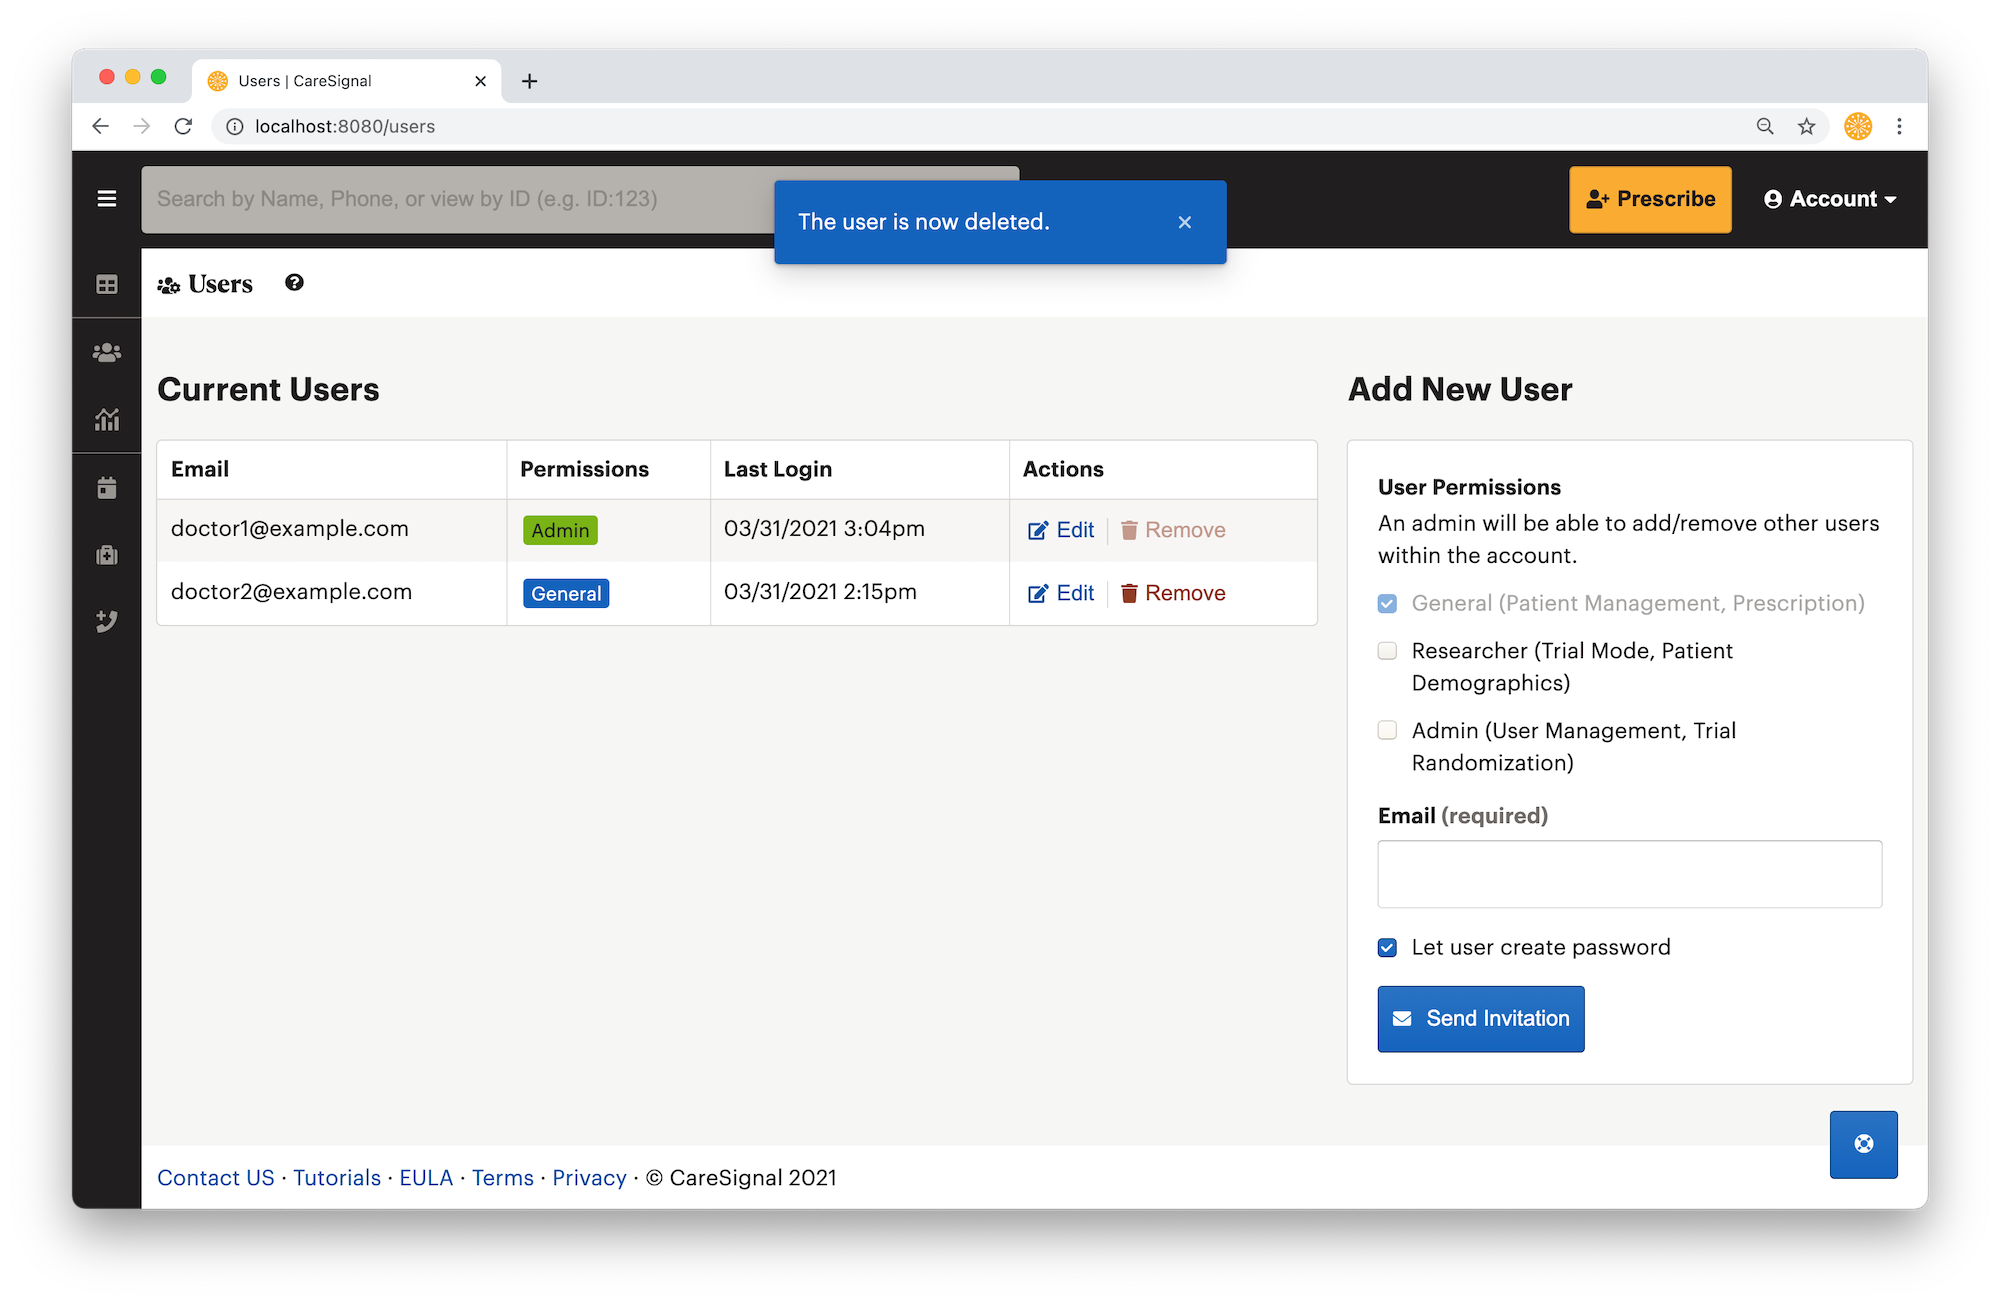
To delete a user, find their entry under current users, and click on the “Remove” button. Confirm that you would like to remove the user, and they will be removed from the system.